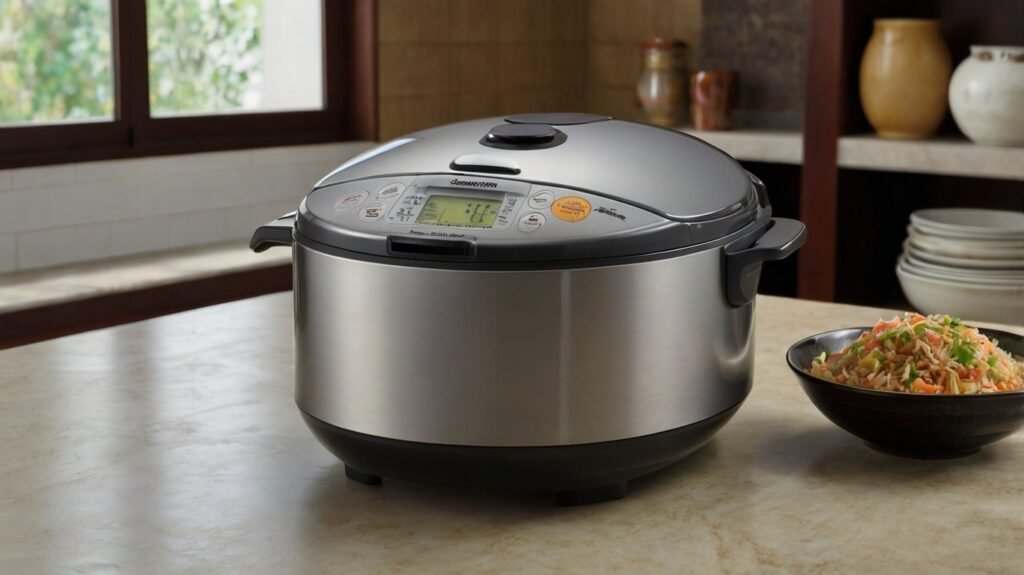
Choosing between the Breville and Zojirushi bread makers can be a daunting task due to the variety of features each model offers. Fortunately, both brands provide excellent functionality that can cater to different baking needs. Let’s take a closer look at the key features of each bread maker to help you make an informed decision.
Design and Build Quality
The design of a bread maker can influence your kitchen aesthetic. Breville presents a modern, stainless-steel exterior that blends well with various kitchen styles. The Zojirushi, while also sleek, features a more minimalist look with a variety of color options. Both brands use high-quality materials ensuring durability, but Breville tends to feel a bit more premium in your hands.
Baking Performance
When it comes to baking performance, both units impress. Here’s how they stack up:
- Breville: Offers a powerful heating element and advanced technology that helps achieve perfect crusts and consistent baking results. The automatic fruit and nut dispenser is a great addition that enhances your baking experience.
- Zojirushi: This model excels with its even baking and large capacity, allowing you to bake up to 2.5 pounds of bread. Its unique dual kneading blades ensure thorough mixing, resulting in better dough consistency.
Programs and Settings
Having various settings allows you to experiment with different types of bread and recipes. Each brand has its strengths:
| Feature | Breville | Zojirushi |
|---|---|---|
| Program Options | 13 programs including gluten-free | 10 programs including whole wheat |
| Crust Settings | 3 crust colors | 3 crust colors |
| Custom Settings | Yes, adjustable time and temperature | Yes, but limited customization |
User Interface
An intuitive user interface can make the bread-making process more enjoyable. The Breville features an LCD screen that is easy to read and guides you through settings. It also has a clear button layout, which means you can quickly adjust your preferences. On the other hand, Zojirushi offers a simpler interface with fewer buttons, which makes it straightforward but might lack some user-friendliness for first-time bakers.
Size and Capacity
Capacity plays a vital role if you plan to bake for larger families or gatherings:
- Breville: Typically, it has a capacity of 1.3 pounds, making it ideal for smaller households.
- Zojirushi: This model often boasts a larger capacity, often up to 2.5 pounds, making it suitable for bigger families or occasions.
Price Point
The price of each bread maker is an important consideration. Breville typically falls in the mid-range category, offering great value for its innovative features. Zojirushi can be a bit pricier, attributed to its robust build and superior performance. Still, some users regard it as an investment due to its reliability and longevity.
Cleaning and Maintenance
Ease of cleaning is a feature that home bakers appreciate. Breville’s non-stick pan and removable paddle make cleaning hassle-free. However, the Zojirushi also offers a non-stick pan, but it tends to have a more intricate design, which might require a bit more effort to clean after baking.
Final Thoughts
Ultimately, choosing between the Breville and Zojirushi bread maker should come down to your specific needs as a baker. If you value a compact design and intelligent features, Breville could be the right fit for you. On the other hand, if capacity and even baking are your priorities, Zojirushi stands out in those aspects. Carefully consider the pros and cons mentioned above, and you’ll be well-equipped to make a choice tailored to your bread-making adventures.
The Benefits of Using a Bread Maker at Home
If you’re a bread lover or just someone who appreciates the warm, delightful aroma of freshly baked bread wafting through your home, a bread maker might just be the perfect appliance for you. Utilizing a bread maker brings numerous advantages that not only simplify the baking process but also enhance your overall experience. Let’s explore the top benefits of using a bread maker at home.
Convenience
One of the main attractions of owning a bread maker is its convenience. Unlike traditional baking methods, a bread maker allows you to throw in your ingredients, select your desired settings, and let the machine do all the hard work. This is especially useful for busy individuals or families who want homemade bread without devoting hours in the kitchen.
Customizable Recipes
With a bread maker, you have complete control over what goes into your bread. This means you can create customized recipes to suit your dietary needs or preferences. Whether you want gluten-free, low-carb, or whole grain, the options are practically endless. You can experiment with different flours, seeds, nuts, and even fillings.
Consistent Quality
When baking manually, there can be a lot of variables to juggle, which may result in inconsistent quality. A bread maker offers precise measurements and settings that help ensure your loaves come out just right every time. You can expect uniformity in texture and taste, making your homemade bread a delicious staple.
Time Efficiency
Let’s face it time is of the essence. A bread maker can significantly cut down your baking time. While the machine handles kneading, rising, and baking, you can focus on other tasks. Most bread makers have timers that allow you to set them up ahead of time, so you can wake up to a freshly baked loaf each morning.
Cost-Effective
Buying freshly baked bread from a bakery can quickly add up. Investing in a bread maker can save you money in the long run. The cost of bread ingredients is generally much lower than pre-made bread, especially if you’re making specialty loaves. You also reduce packaging waste associated with store-bought bread.
Healthier Options
When you make your bread at home, you know exactly what goes into it. Many commercial breads contain preservatives, additives, and other ingredients that might not be healthy for you. By using a bread maker, you ensure that your bread is free from unwanted chemicals and can incorporate wholesome ingredients like whole grains, seeds, and even superfoods.
Fun and Engaging Experience
Baking can be a pleasurable and rewarding experience. Using a bread maker enables you to dive into the art of bread-making without the usual stress and mess. It’s a fantastic way to engage with your family, allowing you to share the joy of baking with children or friends. Plus, you get to enjoy the satisfaction of creating something truly delicious.
Features to Look For
If you decide to purchase a bread maker, it’s beneficial to know the features that will enhance your baking experience:
- Multiple Settings: Look for a machine with various settings for bread types, crust color, and textures.
- Delayed Start: This allows you to set the machine up and have your bread ready when you want it.
- Ease of Cleaning: Non-stick pans and removable parts make cleanup a breeze.
- Viewing Window: A window lets you monitor your bread without opening the lid and disrupting the process.
- Size Options: Some machines can make a variety of loaf sizes, accommodating your needs.
Environmental Impact
By making your bread at home, you help reduce your carbon footprint. You purchase ingredients in bulk, which diminishes waste associated with packaging. Plus, you minimize the emissions linked to transportation when opting for homemade versus store-bought options.
A bread maker can transform your kitchen into a hub of delightful aromas and fresh tastes while offering benefits that range from health-conscious choices to financial savings. If you love the idea of enjoying warm, homemade bread straight from your oven, investing in a bread maker is a rewarding decision both for your palate and your pocket. Give it a try, and you may find yourself loving the whole process of bread-making!
Popular Recipes for Your Bread Maker
Using a bread maker opens up a world of delicious possibilities right in your kitchen. From soft, fluffy loaves to rich, hearty bread, the options are endless. Here are some popular recipes that you can easily try with your bread maker, allowing you to enjoy fresh bread without the hassle of traditional baking methods.
Classic White Bread
This timeless recipe is perfect for sandwiches or toast. With its simple ingredients and straightforward process, it’s a great start for any beginner.
- Ingredients:
- 3 cups bread flour
- 1 1/2 teaspoons salt
- 2 tablespoons sugar
- 2 tablespoons butter, softened
- 1 cup warm water (about 110°F)
- 2 teaspoons active dry yeast
- Instructions:
- Add water, sugar, and yeast to the bread maker and let it sit for 5-10 minutes until foamy.
- Mix in the flour, salt, and butter.
- Select the Basic Bread setting and start the machine.
- Once baked, let the bread cool on a rack before slicing.
Whole Wheat Bread
If you’re looking for a healthier option, whole wheat bread packs in more fiber and nutrients.
- Ingredients:
- 2 1/2 cups whole wheat flour
- 1 cup warm water (about 110°F)
- 1/4 cup honey
- 1/4 cup vegetable oil
- 1 1/2 teaspoons salt
- 2 teaspoons yeast
- Instructions:
- Combine warm water, honey, and yeast in the bread pan. Let it sit for about 10 minutes until bubbly.
- Add flour, salt, and vegetable oil.
- Select the Whole Wheat setting and start the machine.
- Allow to cool before slicing.
Cinnamon Raisin Bread
This sweet and fragrant bread is a breakfast favorite, perfect with butter or cream cheese!
- Ingredients:
- 3 cups bread flour
- 1 teaspoon salt
- 1 tablespoon sugar
- 1 cup warm milk (about 110°F)
- 2 tablespoons butter, melted
- 1 tablespoon cinnamon
- 1 cup raisins
- 2 teaspoons yeast
- Instructions:
- Mix warm milk, melted butter, sugar, and yeast in the bread pan. Let rest for 5-10 minutes.
- Add flour, salt, cinnamon, and raisins.
- Select the Sweet Bread setting and press start.
- Cool on a wire rack once baked.
Focaccia Bread
A versatile Italian bread known for its crispy crust and fluffy inside, focaccia is perfect for dipping in olive oil or serving with meals.
- Ingredients:
- 3 cups bread flour
- 1 teaspoon salt
- 1 tablespoon sugar
- 1 cup warm water (about 110°F)
- 1/4 cup olive oil
- 2 teaspoons yeast
- Rosemary, sea salt, and garlic for topping
- Instructions:
- Combine warm water, sugar, and yeast in the bread pan and let sit for 5-10 minutes.
- Add flour, salt, and olive oil.
- Select the French Bread setting.
- After the first kneading, add toppings and allow the machine to finish.
Gluten-Free Bread
This recipe caters to those with gluten sensitivities while still providing a delicious loaf.
- Ingredients:
- 2 cups gluten-free flour blend
- 1 tablespoon xanthan gum
- 1 teaspoon salt
- 1 tablespoon sugar
- 1 cup warm water (about 110°F)
- 2 teaspoons yeast
- 2 tablespoons oil
- Instructions:
- Combine warm water, sugar, and yeast in the bread pan, letting it rest for 10 minutes.
- Add gluten-free flour, xanthan gum, salt, and oil.
- Select the Gluten-Free setting and press start.
- Cool completely on a rack before slicing.
These recipes are just the beginning of your kitchen adventures with a bread maker. Experiment with flavors, types of flour, and add-ins like nuts or herbs to create the perfect loaf tailored to your taste. Enjoy the delightful aroma of freshly baked bread wafting through your home!
Maintenance Tips to Extend the Life of Your Bread Maker
Taking care of your bread maker is essential for ensuring it lasts for many years while consistently producing delicious bread. Regular maintenance not only enhances performance but also prevents potential issues from arising. Here are several key tips to help you extend the life of your bread maker.
Keep It Clean
Just like any other kitchen appliance, regular cleaning is crucial. Every time you make a loaf of bread, small particles of flour and crumbs can build up. Follow these cleaning tips to maintain hygiene:
- Unplug the machine: Always ensure your bread maker is unplugged before cleaning.
- Remove and wash the pan: Take out the bread pan and kneading blade. Wash them in warm, soapy water. Avoid using abrasive materials that could scratch the non-stick surface.
- Wipe the exterior: Use a damp cloth to wipe the outside of the bread maker. Avoid immersing the entire machine in water.
- Clean the inside: After every few uses, clean the interior with a damp cloth to keep it crumb-free.
Use Proper Ingredients
Using high-quality ingredients can make a significant difference in your bread-making experience. Here’s how to choose wisely:
- Check expiration dates: Always use fresh yeast and flour to ensure your bread rises properly.
- Avoid preservatives: Ingredients with added preservatives can affect the texture and taste of your bread.
- Measure accurately: Always measure ingredients accurately to prevent any mishaps, which can lead to excess strain on the machine.
Be Mindful of Settings
Your bread maker comes equipped with various settings tailored for specific types of bread. Using the correct program can not only improve your bread but also reduce wear and tear on the machine. Here are some tips:
- Use appropriate settings: Refer to the manual when selecting specific bread types, like whole grain, sweet, or gluten-free.
- Don’t overload the machine: Avoid putting too much dough in the pan. This can lead to motor strain and potential damage.
Regular Inspection and Maintenance
Regular checks can keep your bread maker in top shape. Make it a habit to:
- Inspect the power cord: Look for any cracks or damages. If you see any, replace it to prevent electrical hazards.
- Check the kneading blade: Ensure it’s not worn or damaged. If you notice excessive wear, consider replacing it.
- Monitor the machine’s performance: If you notice unusual noises or poor baking results, it may be time for a professional check-up.
Store Properly
When not in use, store your bread maker in a cool, dry place. Avoid areas with high humidity or direct sunlight, as these conditions can deteriorate the machine over time. If you’re storing it for an extended period:
- Remove all parts: Take out the bread pan and kneading blade. Store them separately to avoid damage.
- Cover the machine: Use a soft cloth or a cover to keep dust off the machine.
Follow Manufacturer Guidelines
Every bread maker is designed differently. Hence, it is essential to read your user manual closely. The manual will contain specific maintenance advice tailored to your model. Following these guidelines will ensure that you maintain your bread maker’s functionality and avoid voiding the warranty.
Common Issues to Watch Out For
While regular maintenance is crucial, being aware of common issues can help you troubleshoot problems early. Here’s a list of potential problems:
| Issue | Possible Solutions |
|---|---|
| Loaf not rising | Check the yeast and ingredients for freshness. |
| Burnt crust | Adjust the crust setting to a lighter option. |
| No kneading | Inspect and replace the kneading blade if necessary. |
By implementing these maintenance tips, you can ensure your bread maker operates efficiently for years to come. Regular care not only produces better bread but also saves you money by extending the life of the appliance. Happy baking!

How to Choose the Right Bread Maker for Your Needs
Choosing the right bread maker can significantly enhance your baking experience. With so many options available, it’s essential to consider several factors to ensure you select a machine that meets your unique needs. By understanding what you require, you’ll enjoy freshly baked bread with ease.
Identify Your Baking Needs
First, consider how often you plan to use the bread maker. Are you a casual baker or a more frequent user? Your baking frequency will influence the features you may need.
- Casual Baker: A basic model should suffice, offering simple functions for occasional bread making.
- Frequent Baker: Opt for a machine with advanced options for varied recipes, such as gluten-free or artisan bread.
Consider the Size
The size of the bread maker is another important factor. Think about the following:
- Counter Space: Measure the area where you intend to keep the bread maker.
- Loaf Size: Most machines make 1-2 pound loaves. Choose a size that fits your household’s needs.
Here’s a quick comparison of common loaf sizes:
| Loaf Size | Suitable For |
|---|---|
| 1 lb | Singles or couples |
| 1.5 lb | Small families |
| 2 lb | Large families or gatherings |
Understand Features that Matter
Different bread makers come with various features. Here’s what you should look for:
- Program Settings: Choose a machine with pre-programmed settings for different types of bread, including whole grain, gluten-free, and jam.
- Crust Control: Some machines allow you to select the crust color light, medium, or dark catering to your taste.
- Timer Function: A delay timer lets you set up preparations earlier in the day so you can wake up to fresh bread.
- Keep Warm Feature: This feature maintains the bread’s temperature after baking, ensuring it’s ready when you are.
- Mixing Paddles: Check if the bread maker comes with a single or dual paddle, as dual paddles generally provide better mixing.
Assess the Ease of Use and Cleanup
It’s vital that the bread maker is user-friendly. Ensure it has clearly labeled buttons and a straightforward display. A bread maker with a non-stick pan is easier to clean, reducing the hassle of scrubbing baked-on bread.
Examine the Price Range
Buy a bread maker that fits your budget. Prices can vary widely depending on features and brand. Here’s a helpful price breakdown:
| Price Range | Expected Features |
|---|---|
| Under $100 | Basic functionality, few preset options |
| $100 – $200 | Intermediate functions, programmable settings |
| Over $200 | Advanced options, durable build, more features for serious bakers |
Read Reviews and Ratings
Before making a purchase, read customer reviews and ratings on different models. This step provides valuable insight into the performance and reliability of the bread maker. Look for reviews discussing the quality of bread produced, ease of use, and any common issues. Sites like Amazon and specialized kitchen appliance websites often offer detailed feedback.
Consider Warranty and Customer Support
A good warranty ensures that your investment is protected. Check if the manufacturer offers a solid warranty period, typically ranging from 1 to 3 years. Exceptional customer support can make a big difference too, especially if you encounter issues or have questions about your bread maker. Make sure the brand you choose provides accessible customer service.
By taking these factors into account, you can confidently choose a bread maker that aligns perfectly with your baking habits and preferences. Happy baking!
Conclusion
When choosing between the Breville and Zojirushi bread makers, it’s essential to reflect on your personal needs and preferences. Both brands offer a range of impressive features that can elevate your home baking experience. Breville impresses with its innovative technology and user-friendly interface, making it ideal for those who enjoy experimenting with different recipes. On the other hand, Zojirushi is renowned for its reliability and superior quality, perfect for bread enthusiasts seeking consistent results.
Using a bread maker at home brings numerous benefits, from the delightful aroma of freshly baked bread to the satisfaction of knowing exactly what goes into your loaf. Whether you opt for classic white bread or explore adventurous flavors, there are numerous popular recipes to tailor your baking journey.
To ensure longevity and optimal performance of your bread maker, don’t overlook maintenance tips like regular cleaning and proper storage. With the right care, both Breville and Zojirushi machines can serve you well for years to come.
Ultimately, the right choice between the Breville and Zojirushi bread maker rests on your baking style, preferred features, and budget. No matter which you choose, investing in a quality bread maker can transform your kitchen into a hub of deliciousness, allowing you to enjoy homemade bread whenever the craving strikes. With a bit of exploration and practice, you’re bound to create bakery-worthy loaves that will impress your family and friends.